How to bypass a ledge
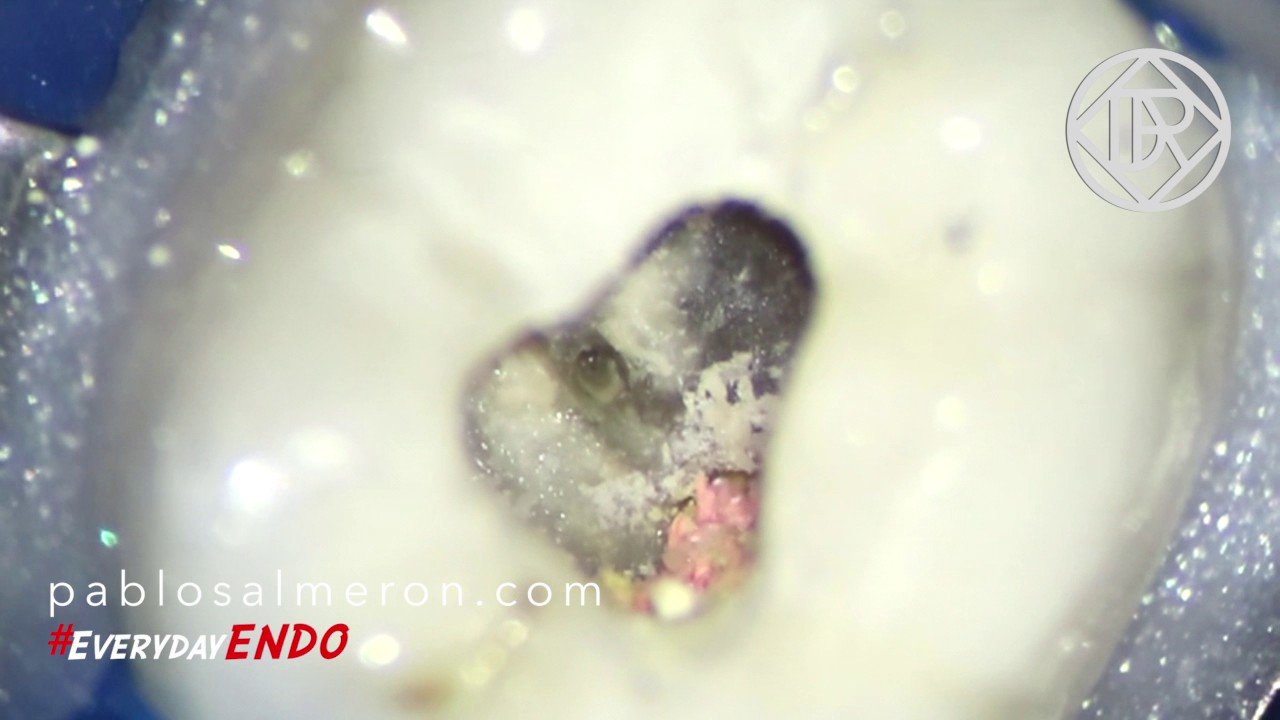
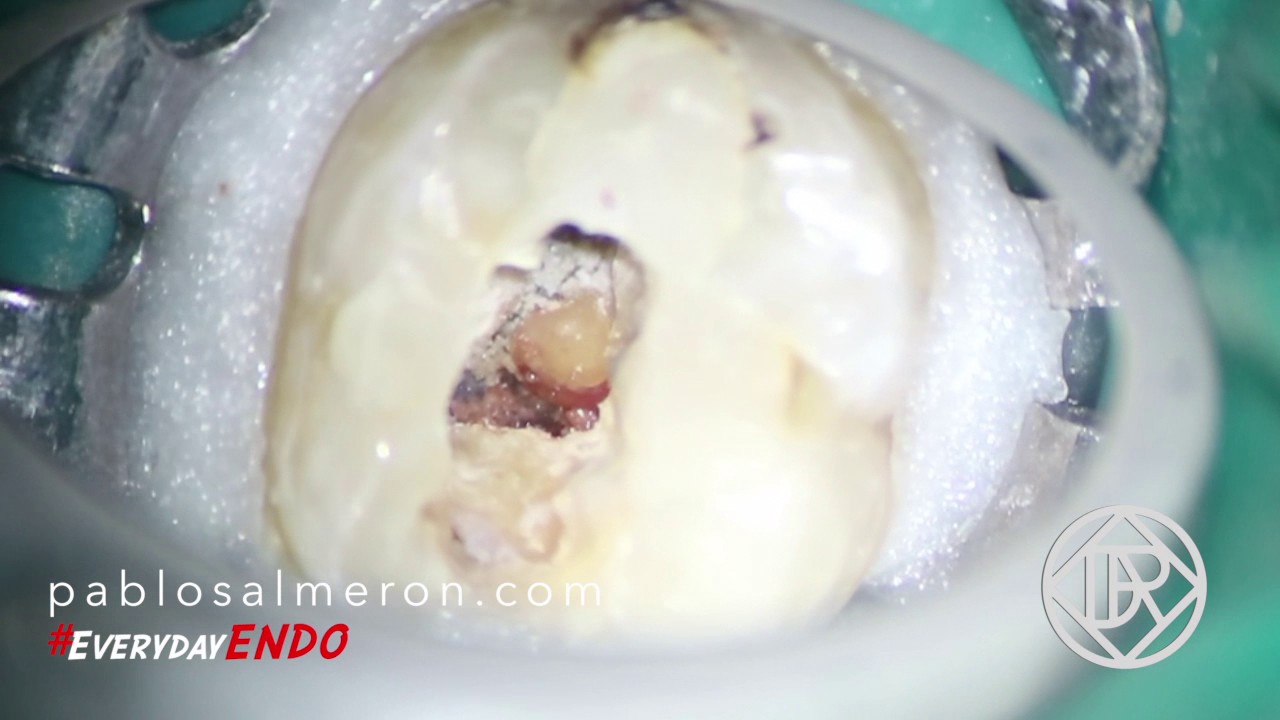
As you can see on the video, please watch it on 720p50 HD, the case I want to show today is a re-treatment of a lower left six first molar #36. The tooth presented a ledge and missed canal on the mesial root and another ledge and a broken instrument on the distal.

Although ledges sometimes can look easy to bypass, is not always possible to do mainly because of the location of the ledge and the patient’s opening mouth range.
Our instruments are flexible but tend to work in a straight line because their memory effect. To bypass and fix this kind of problems, we need to approach the canal in the proper angulation and as I said, sometimes is really tricky because of the limited opening range of the patient. We need to pre-bend our instrument with the proper angulation and remove dentin, as less as possible, from inside of the canal with small ultrasonic tips in order to straighten the access. A CBCT will allows us to visualize the anatomy of the root and identify the real angulation of the canal which is something we have to keep in mind when we try to bypass the ledge.
Patient, knowledge of the anatomy and the use of high magnification as the surgical microscope are the keys to success in this kind of treatments.
“Remove know from knowledge and you are standing on the ledge”.
PhD. MSc. Dr. Pablo Salmeron.