
File retrieval
In this case, the doctor referring the patient asked me if I could retrieve the broken file.

File retrieval is always changeling for me because usually requires a lot of time and the collaboration of the patient trying not to move due to the high magnified field of view where I work on and a lot of patience as well; the use of the proper equipment plays a very important role.
This case has been done with ProUltra ultrasonic tips (Dentsply) under the Labomed Magna surgical microscope view.
These tips are made of titanium and can be pre-curved allowing to work in the direction you want. The bad side of these instruments is that they tend to get blunt and break very easily.
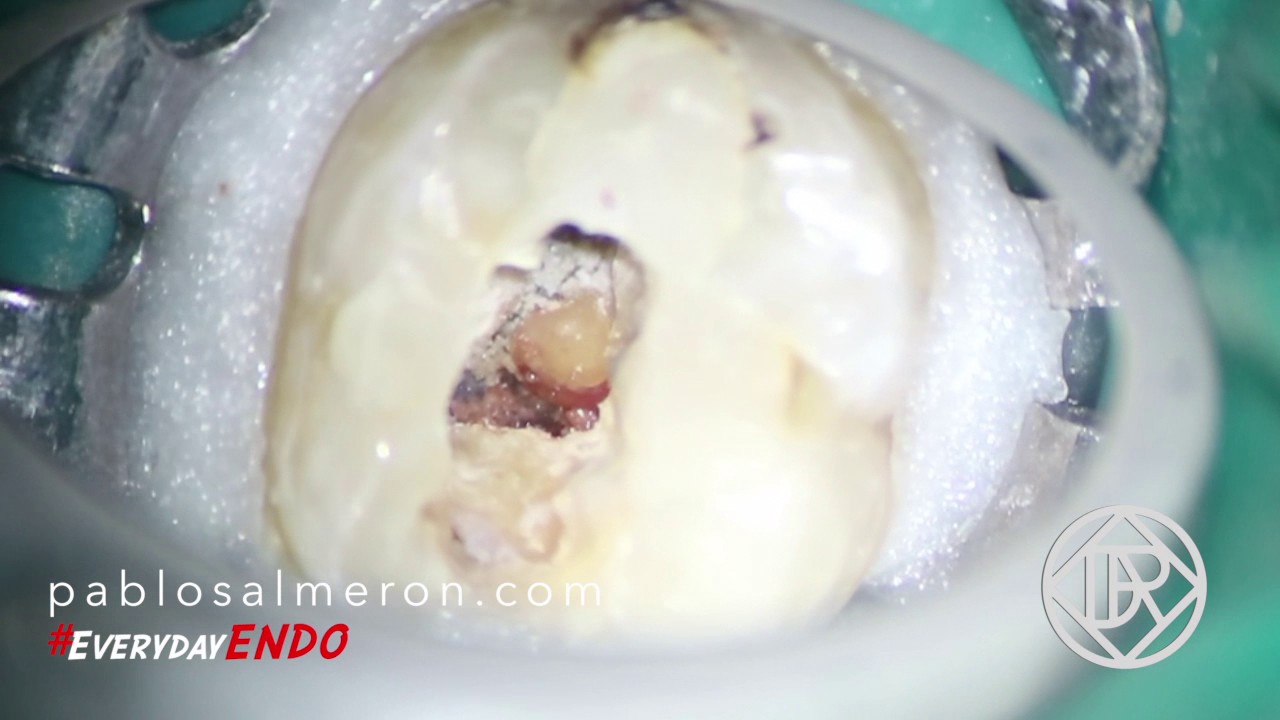
The use of the macriscope is a must, you need to see where are you activating the ultrasonic tip to preserve as much dentin as possible and to avoid perforations.

The broken file it behaves as a rigid body due its short length although the alloy what is made of should let it behave as a flexible metal. As I told before, be patient and remove dentin little by little to create more space is the only way to get the file out of the canal.
My advice for this kind of situations is try to bypass the broken file first, and if you can’t, try to retrieve it. Bypassing instruments is something that I’m not able to do 90% of the time.
Wise to resolve, and patient to perform.
Dr. Pablo Salmeron at Dr. Roze & Associates.


 In this post I’m going to talk about vertical fractures regarding a case I had a few months ago, the one on the right picture. This maxillary first premolar was ready to get a root canal therapy but presented a mesiodistally vertical coronal fracture that continued to the furca which divided the tooth in two roots, bucal and palatal. The tooth had an old restoration on the distal side that was not in occlusion and that probably let the fracture appear on the mesial area where you can see the line fracture. The tooth was also sensitive to vertical percussion and had some mobility, however, there wasn’t significant evidence or bone loss on the radiographic tests.
 Most of the vertical fractures are due to excessive concentration of loading over some areas of the root canal. Studies have shown that the curvature of the root canal seems more important than the external morphology of the root, in terms of stress concentration, the remaining thin dentin increases the magnitude but not the direction of the stress generated by forces. In fact as thinner the mesiodistal dentin walls are, the concentration of forces on the lingual and bucal walls increase the risk of fracture in this direction contrary to what one might think at first, more dentin thickness the harder it is to break in that direction, well… it is not like that.
 Diagnosis vertical fractures are a challenge for the dentist because the symptoms are similar to a failed root canal treatment and usually radiographic test doesn’t show evidence of a fracture clearly. Another problem in endodontically treated teeth is often the filling materials doesn’t allow us to see the fracture line on the radiograph as they’re in the same plane. Patients may experience anxiety to thinking that the endodontic treatment is not working when, in fact, the problem is a fracture prior or post to the root canal treatment.